For Vehicles:
- 2002-1997 Lincoln Continental
- Read this instruction sheet and any instructions printed on the parts package carefully prior to removing the components from the vehicle.
- Part number on shock or spring may differ from part number on carton. The contents are correct for the vehicle.
- For questions or concerns, contact the Monroe Technical Resource Center at 734-384-7809.
WARNING!
- Always wear safety glasses for eye protection.
- Use safety stands whenever a procedure requires you to be under a vehicle.
- Before servicing any electrical component ensure the key is out of the ignition, ignition is off and the negative lead is disconnected from the battery. Refer to the owner’s manual for the correct procedure.
This kit replaces the rear air springs on vehicles listed above. This will eliminate the air springs replacing them with conventional coil springs. The components in this kit are designed to replace the worn or non-operational original equipment components in the vehicle. Leaving the air suspension switch in the off position will prevent the air pump from operating. The air suspension warning message may have to be reset with each ignition cycle.
- Two coil springs.
- Two upper spring seats and isolators.
- Two lower spring seats and isolators.
- Instruction sheet (FORM01214).
The original ride heights of these vehicles may vary with age, mileage, and options. Measure and record existing height, this is measured from center of the wheel to the bottom of the fender well opening lip. The ride height could be considerably higher or lower than factory specifications if the air suspension system is not functioning properly. After kit installation, the ride height may be equal to or exceed factory specifications, but will settle after several days. Keep in mind a new coil spring may sit higher than the OE air spring.
- Raise vehicle by frame at proper lift points. Consult Owner Manual if necessary and make sure the vehicle is properly supported.
- If the air suspension does not deflate with the wheels hanging, use a bi-directional scan tool to deflate the air suspension system.
- Disconnect the air solenoid from the air spring by removing the retaining clip and rotating counter-clockwise. Caution: Residual air pressure may be released abruptly when removing the solenoid.
- Secure air solenoid to under carriage. Disconnection of the electrical connector or air line is not required or recommended.
- Depress the locking tabs on the bottom of the air spring while compressing the air spring up.
- Depress the locking tabs on the top of the air spring, rotate, and remove the air spring.
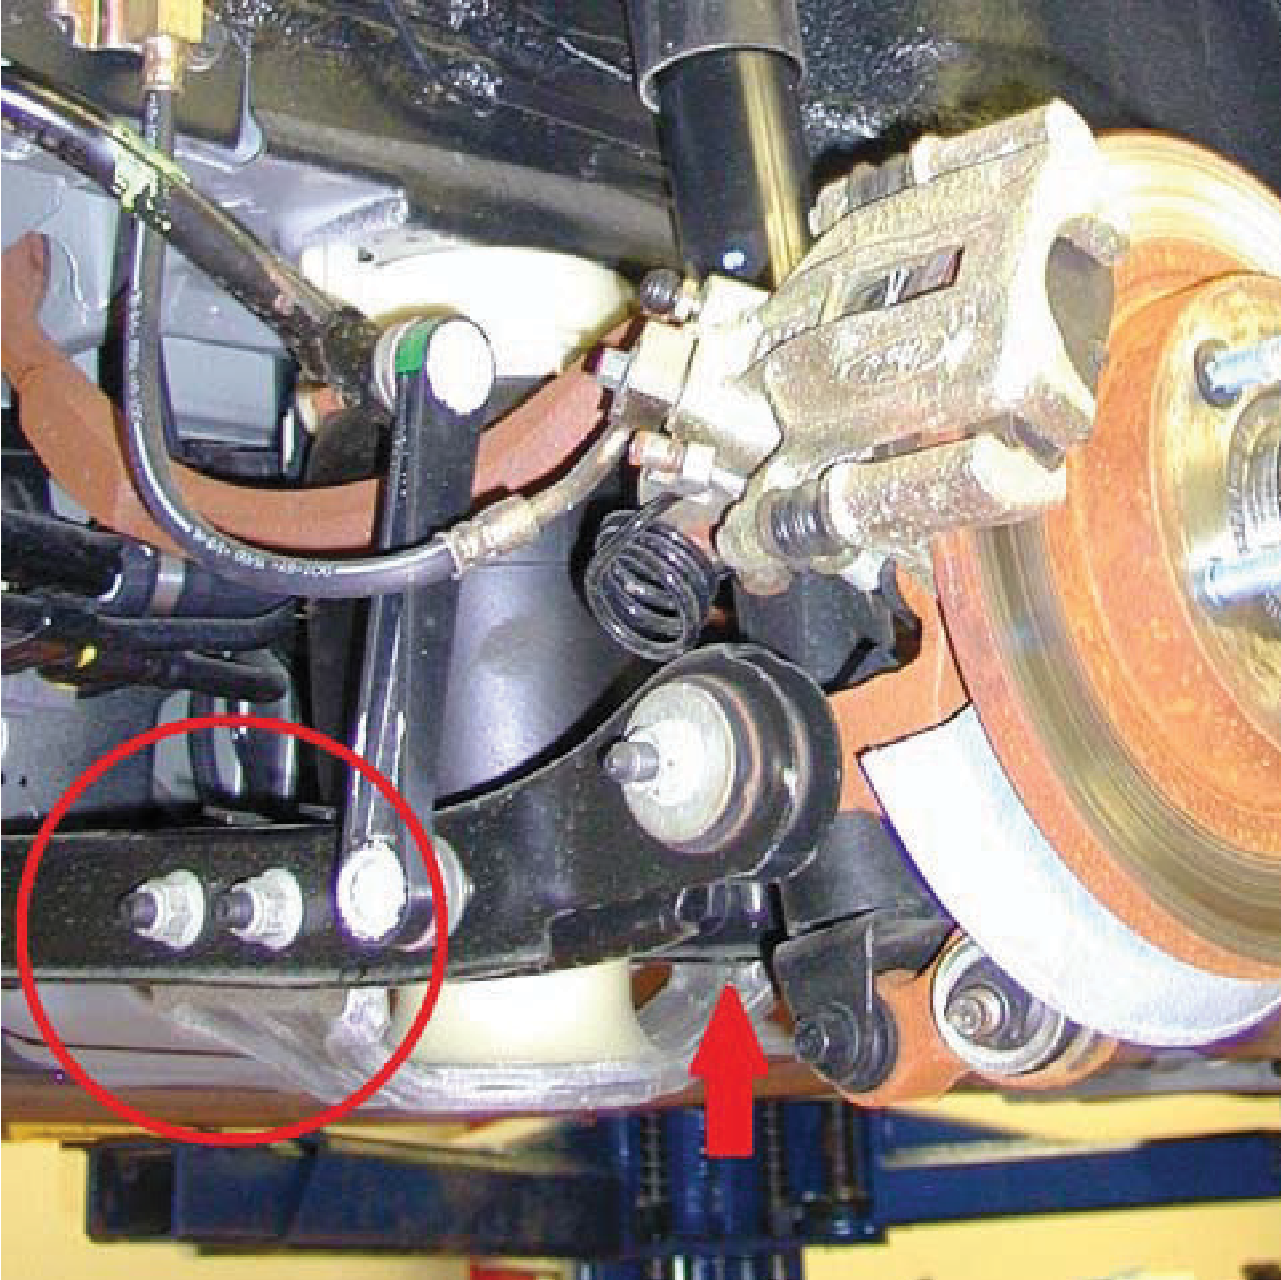
- Remove the lower spring seat by removing the three retaining bolts and nuts. (see photo).
- Remove the lower shock mounting hardware.
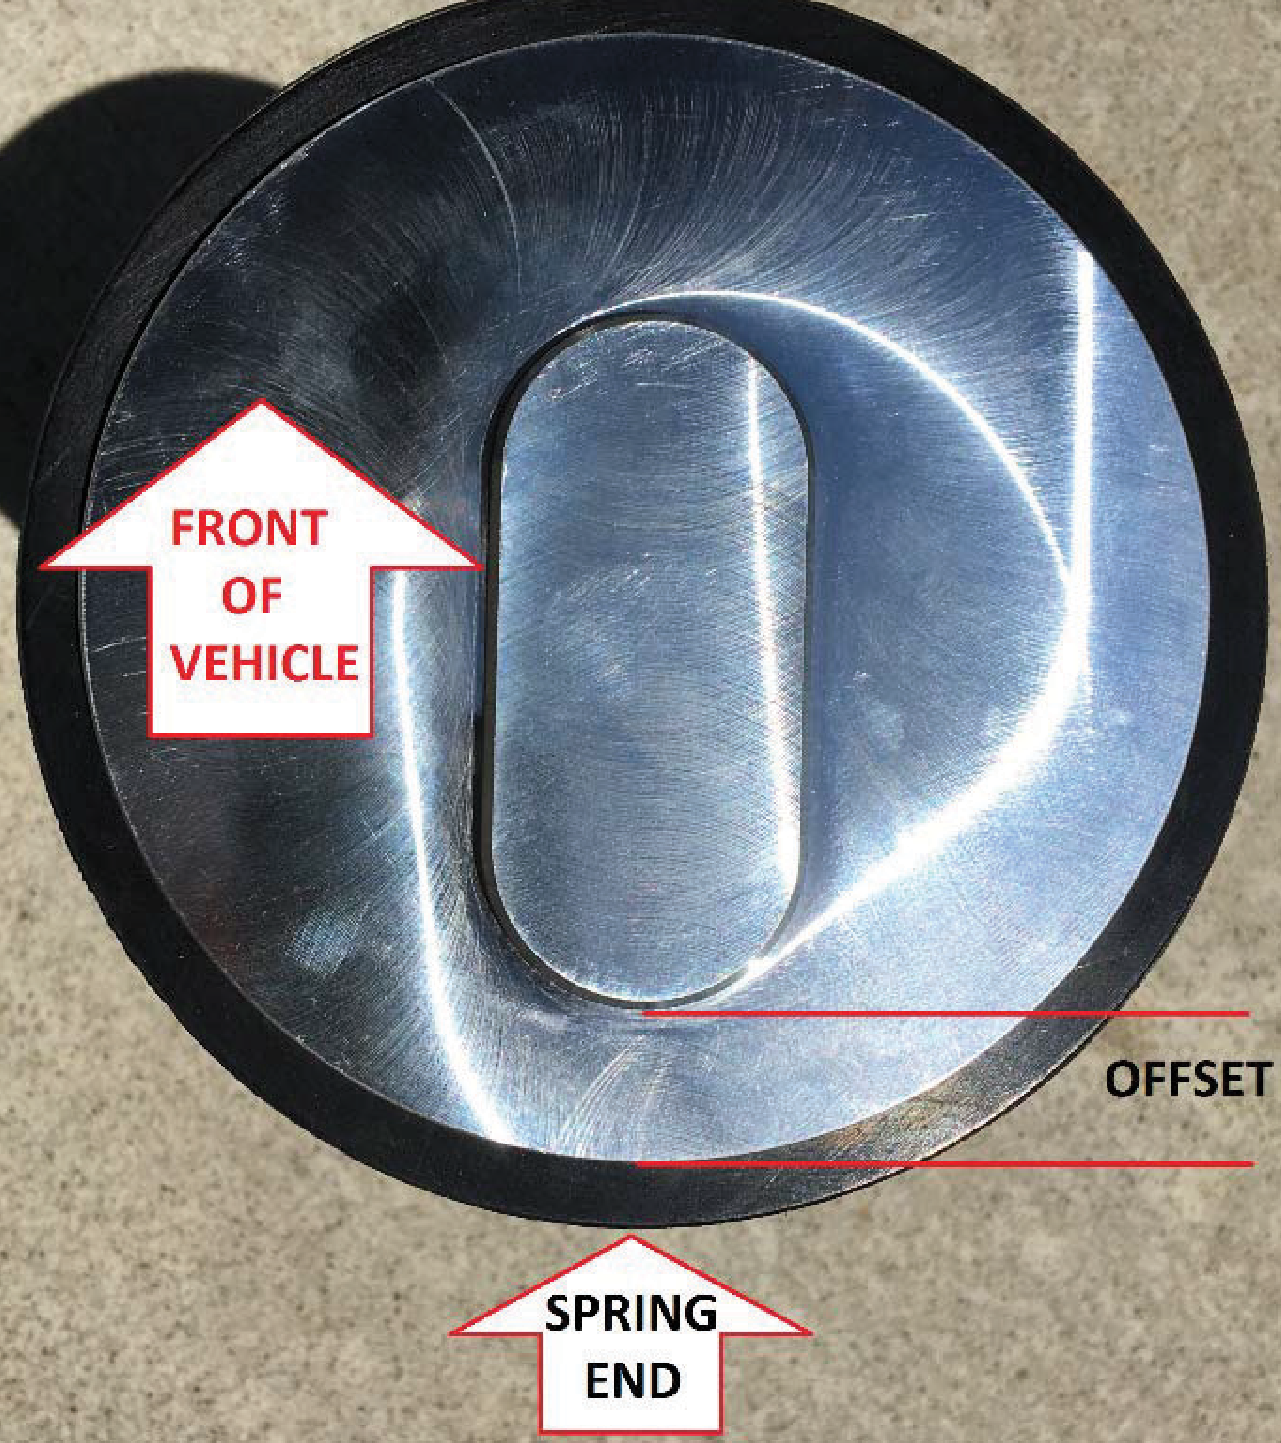
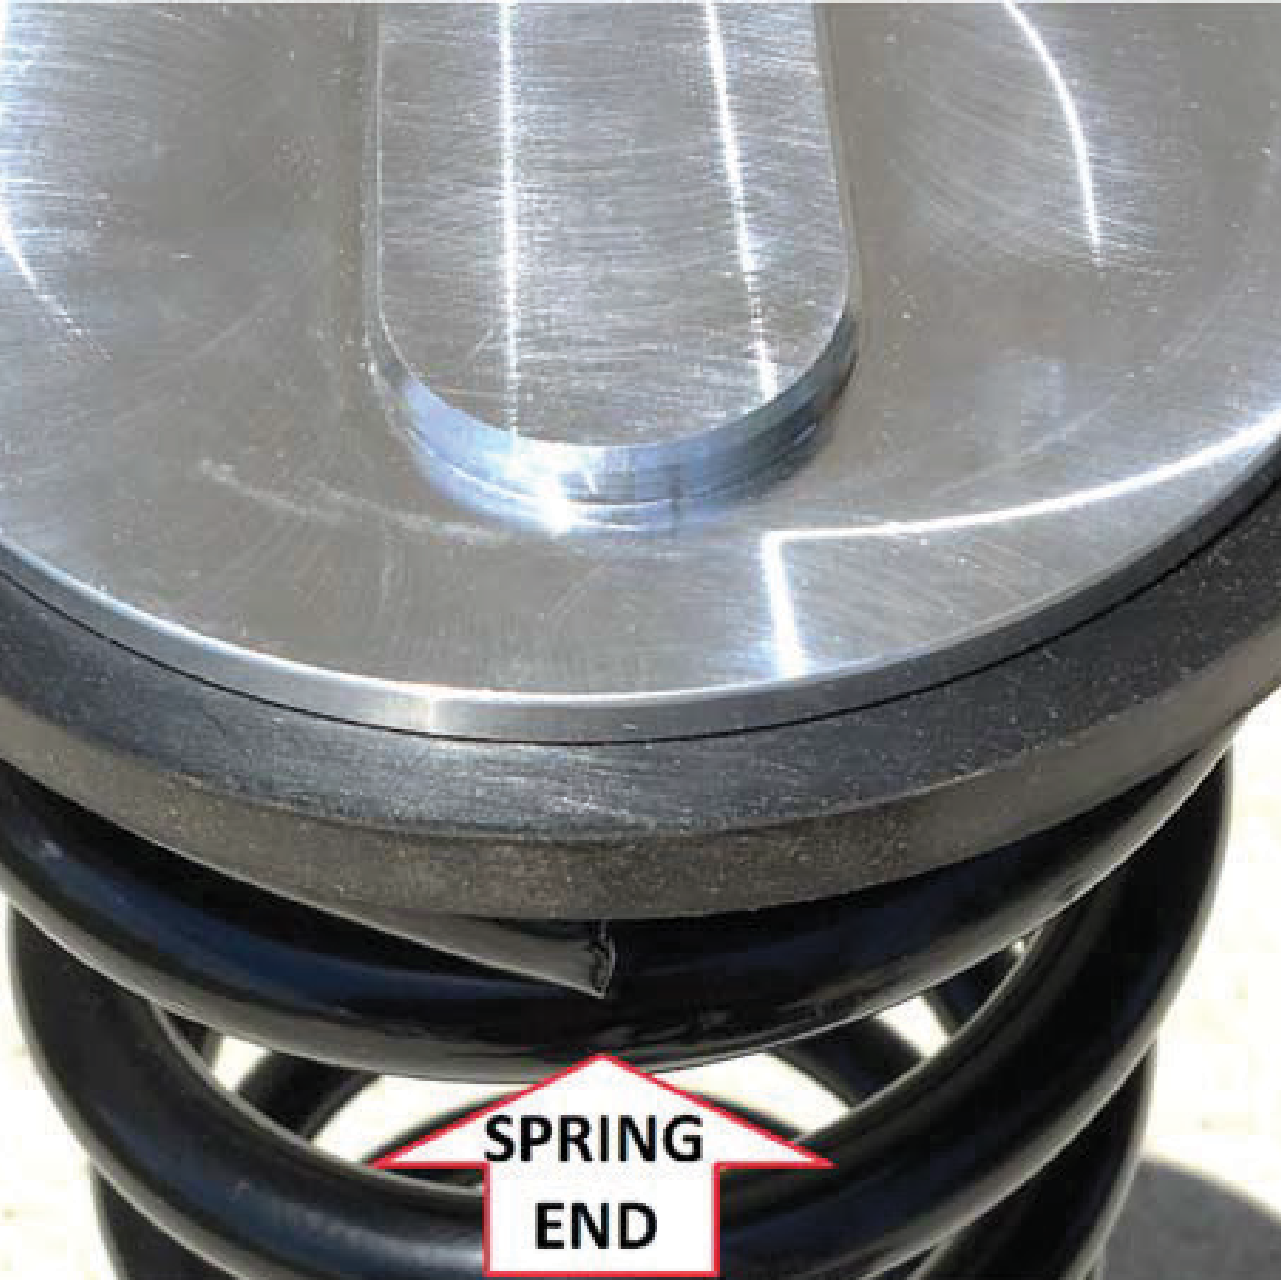
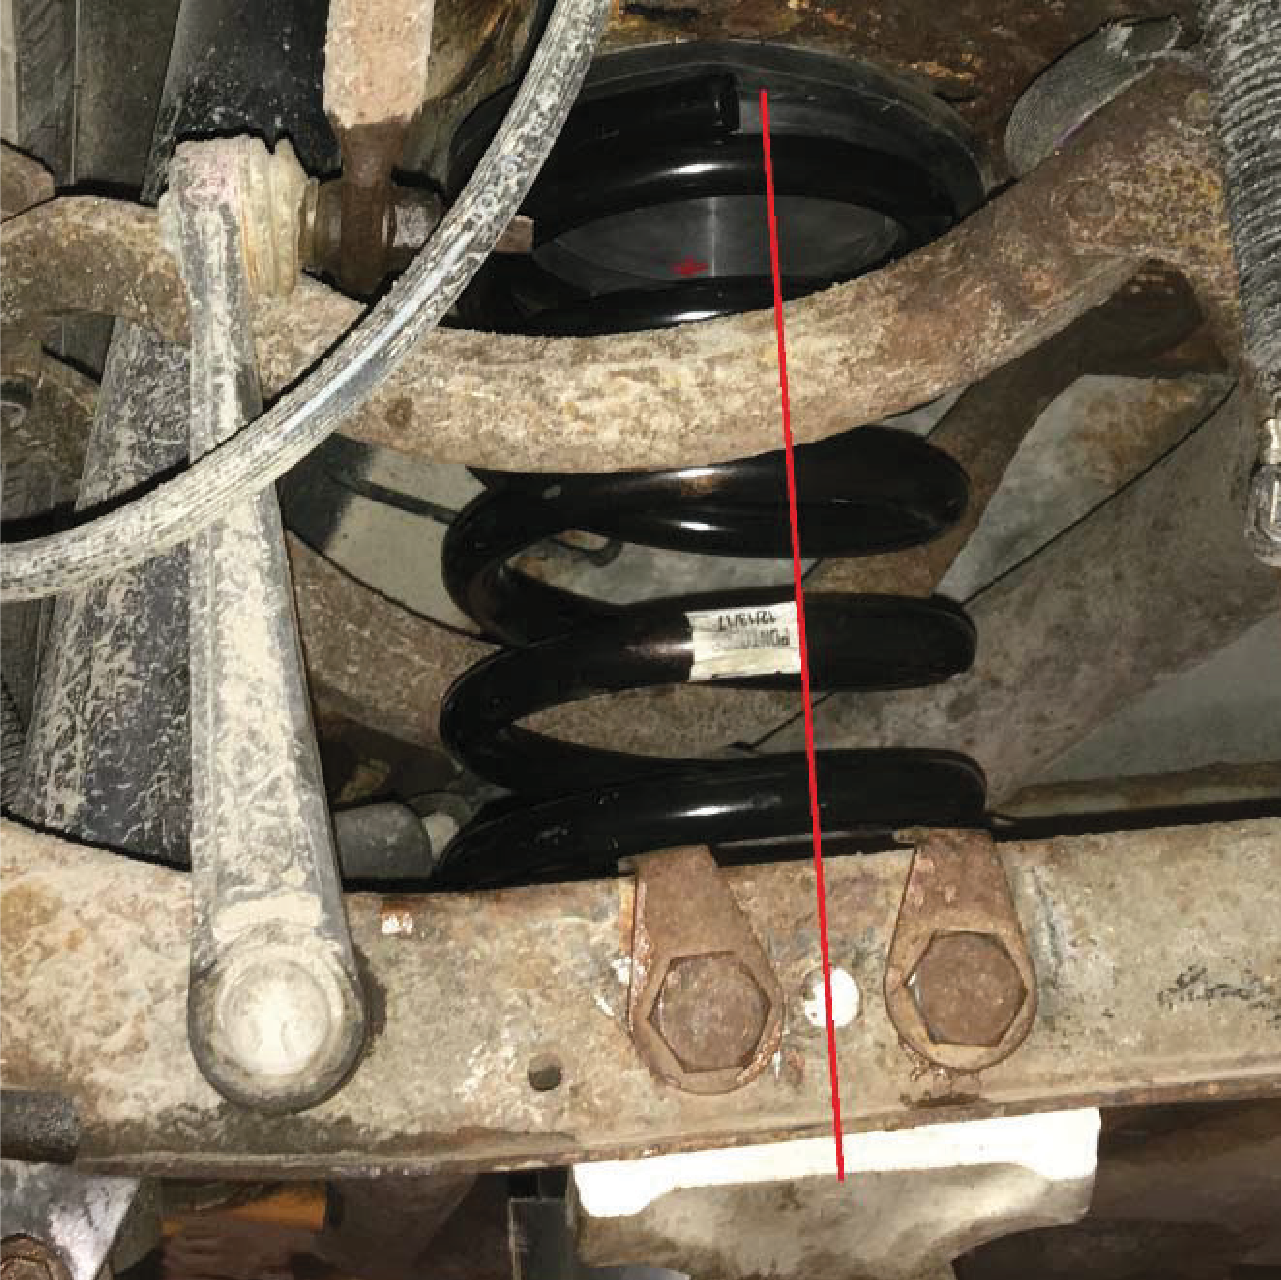
- Insert the larger isolator and spring seat adapter onto the top of the coil spring (larger diameter coil facing up). Orient the offset raised section of the spring seat adapter with the end of the coil spring as shown in photos below. Note: During installation the offset raised section and the end of the coil spring should both be facing the rear of the vehicle.
- Install the lower spring seat adapter and isolator onto the lower spring seat. Install coil spring assembly onto the lower isolator while aligning the upper offset and the upper end of the coil spring with the two lower mounting bolt holes.
- Using a jack, carefully raise the lower spring seat and spring assembly into position. Install original spring seat hardware with bolts facing inward. Caution: Take care with spring under pressure until spring seat is secured.
- Install lower spring seat mounting nuts and torque to 50-68 lb-ft (68-92 N·m).
- Install lower shock mounting hardware, lower vehicle onto the ground, and torque to 59 lb-ft (80 N·m).
- If the air suspension warning message is present then disable air suspension by turning off the switch located in the trunk on the driver’s side of the vehicle. The warning message will have to be reset with each ignition cycle. If no warning message is present then unplug the electrical connector at the air pump and leave the air suspension switch in the on position.