For Vehicles Originally Equipped with Rear Air Spring Systems:
- 2011-1992 Ford Crown Victoria and Mercury Grand Marquis
- 2011-1990 Lincoln Town Car
- Read this instruction sheet and any instructions printed on the parts package carefully prior to removing the components from the vehicle.
- Part number on shock or spring may differ from part number on carton. The contents are correct for the vehicle.
- For questions or concerns contact the Gurus On Call at 1-800-325-8886.
WARNING!
- Before servicing any vehicles equipped with original air spring suspension, turn off the "air suspension switch" in the trunk area.
- Do not attempt to remove the air spring from suspension if still containing air. Release the air from the spring before servicing.
- If the shocks supplied are nitrogen gas pressurized, do not heat or open.
- Always wear safety glasses for eye protection.
- Use safety stands whenever a procedure requires you to be under a vehicle.
This kit replaces the rear air springs on vehicles listed above. This will abort the air springs replacing them with conventional coil springs. There is method to disallow the pump system to operate. The components in this kit are designed to replace the worn or non-operational original equipment components in the vehicle. These coil springs are the same as the standard coil springs found on base model suspensions. If air springs have failed, but the air pump is still functional, it is suggested that replacement air springs are installed, which will not abort the air system.
This conversion contains the necessary instructions to eliminate the electronic warning signals on some models.
Ford Crown Victoria/Mercury Grand Marquis
- 1991-1997 and 2000-2006:
A separate control module controls the system, with a diagnostic plug located in the trunk near the air system shutoff switch. - 1998-1999 and 2007-2011:
The separate electronic diagnostics plug was eliminated. On these vehicles, diagnostic information runs through the main ECU which is accessed through the central data link connection (DLC) located under dash. On these systems the message center indicating “SERVICE AIR SUSPENSION” may NOT be eliminated.
Lincoln Town Car
- 1991-1997:
A separate control module controls the system, with a diagnostic plug located in the trunk near the air system shutoff switch. - 1998-2011:
The separate electronic diagnostics plug was eliminated. On these vehicles, diagnostic information runs through the main ECU which is accessed through the central data link connection (DLC) located under dash. On these systems the message center indicating “SERVICE AIR SUSPENSION” may NOT be eliminated.
Inspect all original parts as removed from the cartons for correct quantity and damage. Obtain replacements when necessary.
The original ride heights of these vehicles with vary by age and mileage. Measure and record original height. The ride height could be considerably higher or lower if the air suspension is not functioning properly. After kit installation, ride height may be equal or exceed factory measurements, but will settle to factory specification after several days. Measure from the centerline of wheel to the bottom of the fender well opening lip.
- Prior to lifting vehicle and removing wheels, turn OFF the air suspension control switch, which is located on the left hand side of the luggage compartment in the trunk. Make sure that the ignition switch is to the OFF position.
- Raise vehicle at proper lift points and remove wheels. (Consult Ford Owners Manual if necessary) Make sure the vehicle is properly supported.
- Support the axle with hoist or adjustable lift/stands. Remove the shock absorber lower mounting bolts and save for reuse (if necessary). Lower axle down slightly, be sure NOT to stretch brake lines or ABS sensor wires.
- It is not necessary to remove the electrical connection or air line at this time, as the solenoids will be packaged and retained on vehicle. To remove solenoid valves and exhaust air from the springs, remove the clip from solenoid valve. Then rotate counter-clockwise to the first stop. This will allow the air in the spring and system to slowly exhaust.
- Rotate the solenoid valve to the second stop, and the air will exhaust quickly. All air must be released before removing solenoid. Rotate the solenoid to the third stop, and remove from the air spring housing. Do not remove solenoid from the vehicle as they will be secured and remain on the vehicle later in the procedure.
- After the solenoid valves have been removed and all air is exhausted, disconnect the ride height sensor from the lower ball stud mount. The sensor will remain on the vehicle, secured to the upper frame cross member later in the procedure.
- Lower the axle down to remove the air springs. Caution should be used not to stretch or bend brake lines/hoses or ABS sensor wires. The lower end of the spring has a retaining clip pushed into the inside diameter of the axle spring seat. Remove by either prying up the lower end of the spring or by tapping on the retaining clip from the bottom side using a punch. Remove the retainer clip at the top of air spring, above upper spring seat. This will then allow for removal of the air springs from the vehicle.
- If replacing the shock absorbers, remove the upper stem attachment and remove from vehicle. Discard properly using recycle methods for this type product.
- If replacing the shock absorbers, install the upper stem mounting attachment, and tighten securely.
- Install coil springs using the provided isolators on the upper end of the spring. If the coil spring is a variable rate design, install with the close coils toward top or frame seat.
- Raise the axle assembly slightly after both springs installed and attach lower shock absorber mounting bolt. Make sure that the springs are secure and tight between the spring seats in suspension.
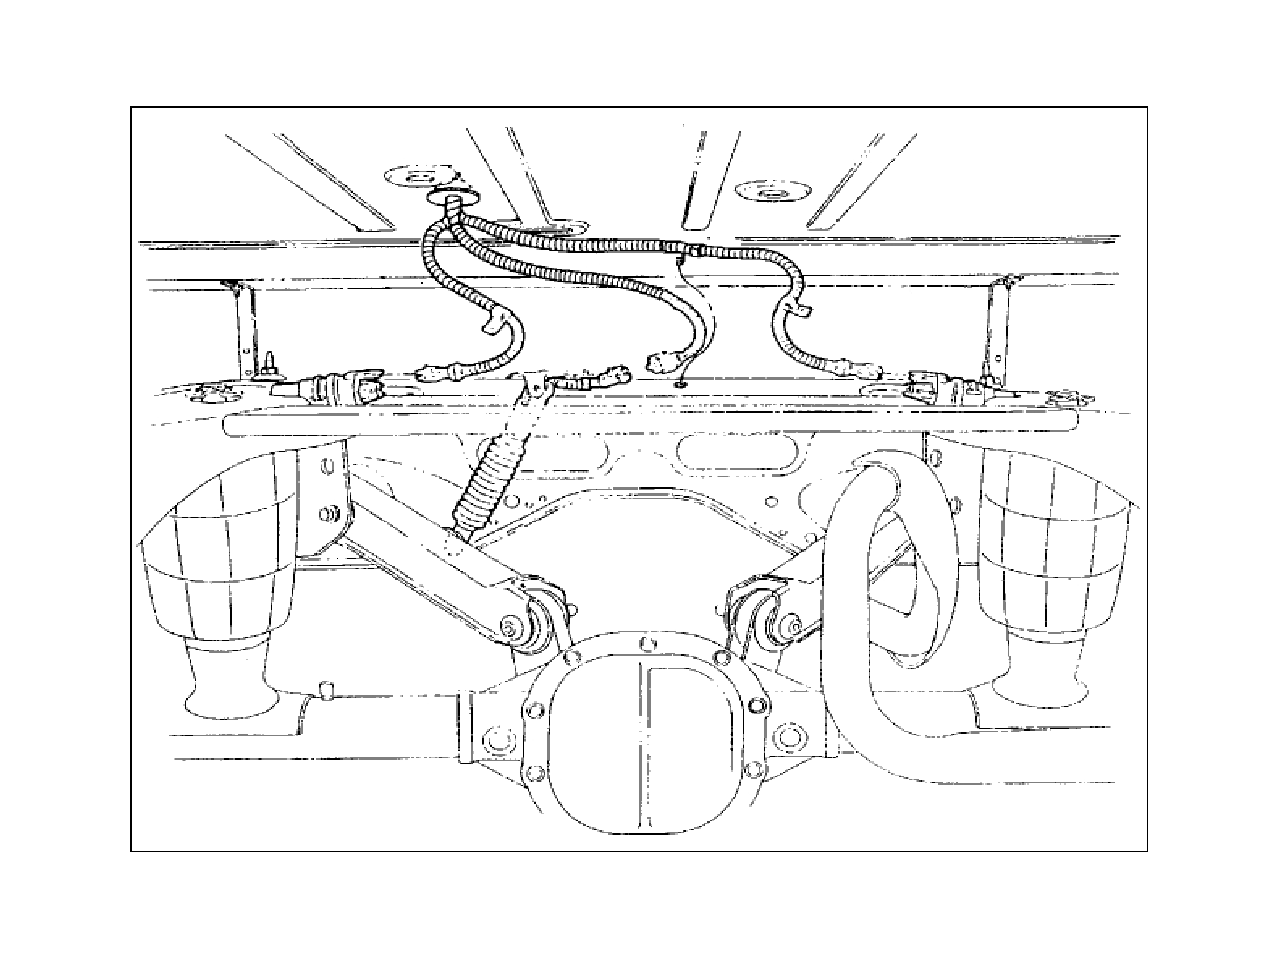
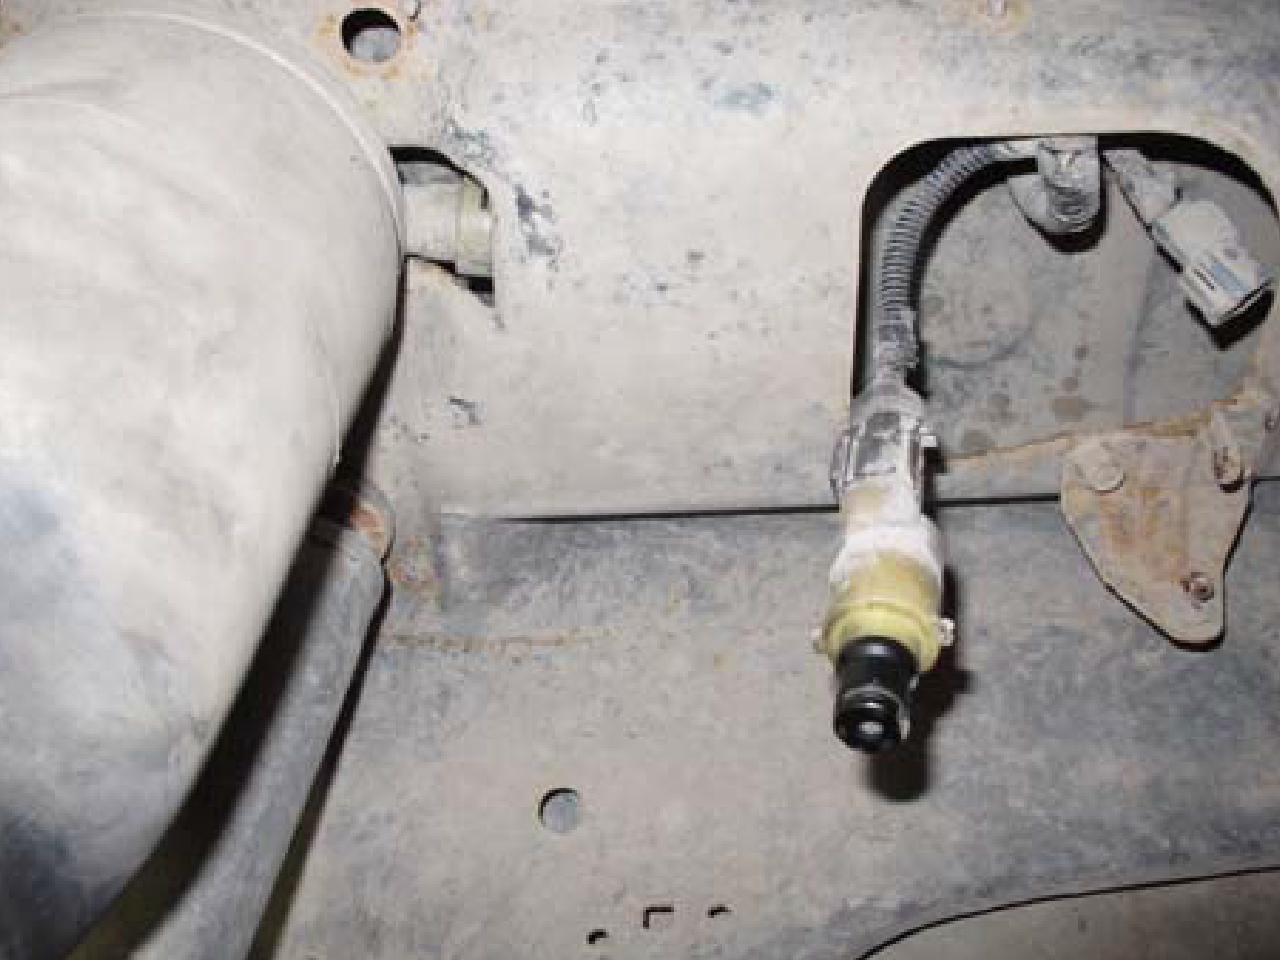
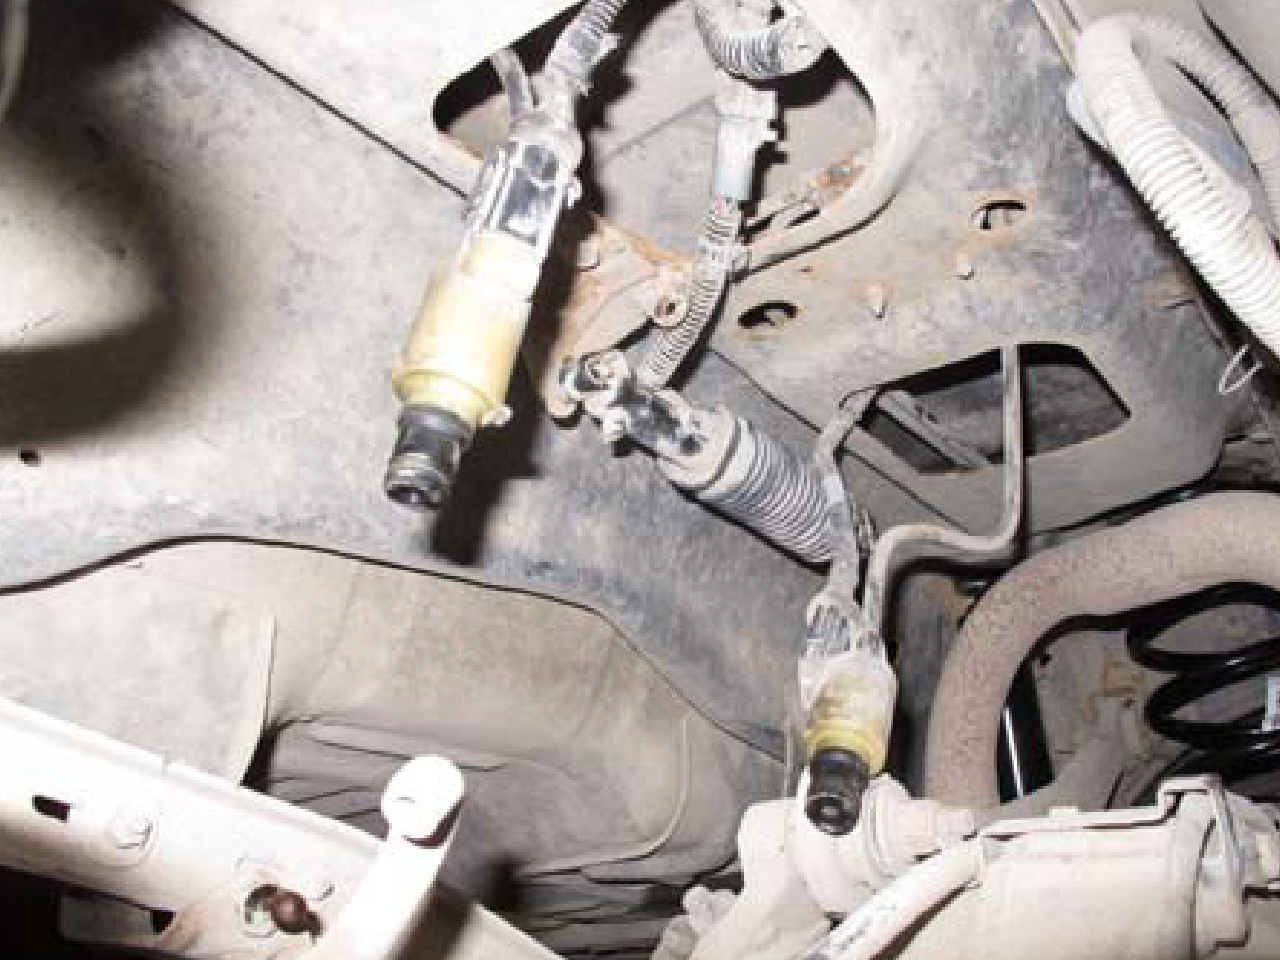
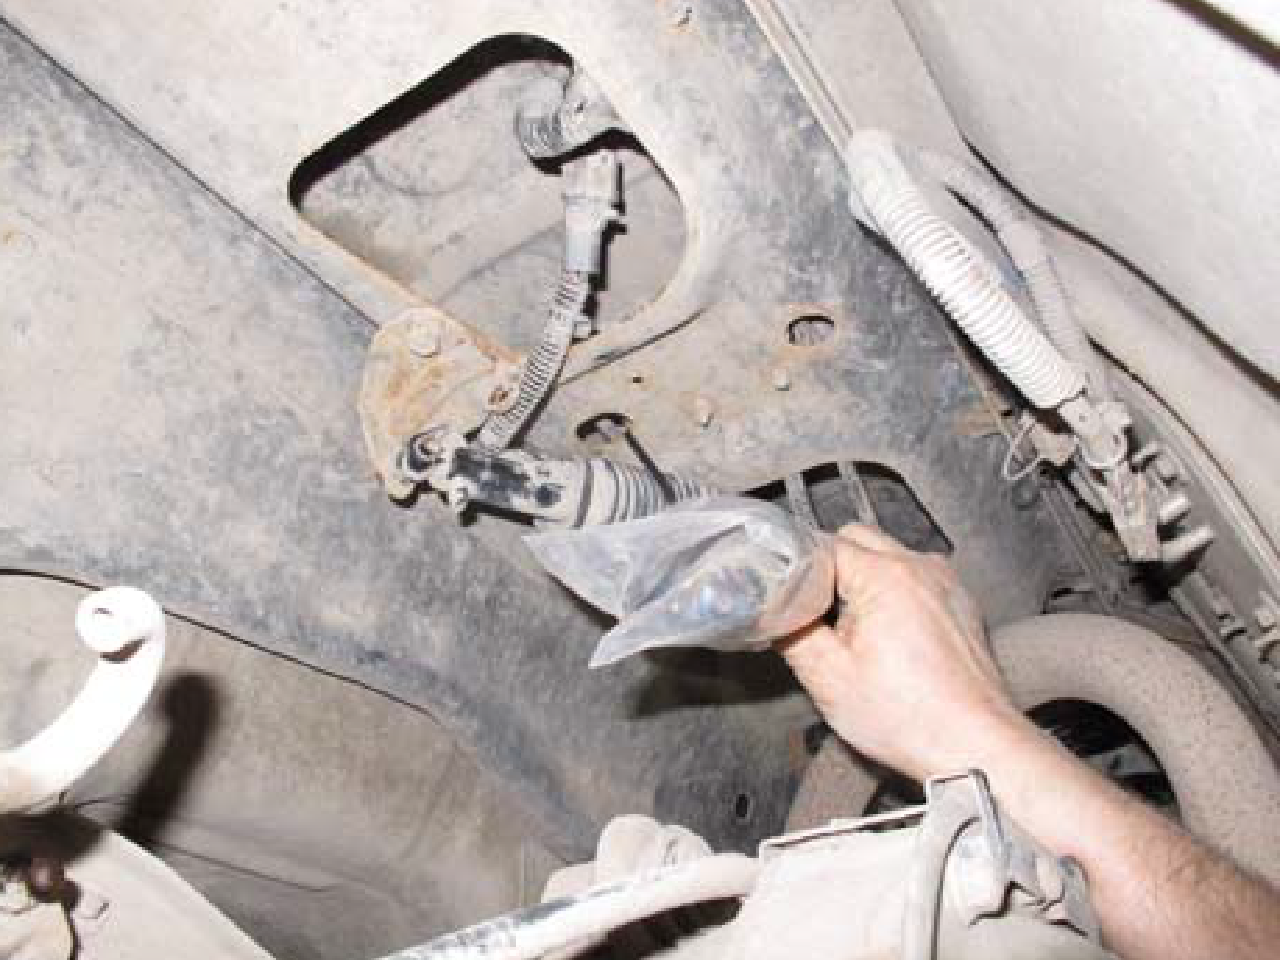
- (FIG 3 thru FIG 5) Place the solenoid valves into a poly bag and seal end with electrical tape to keep clean. Secure these packages into the upper frame using cable ties, making sure location are away from the exhaust system. Attach the ride height sensor to one of the holes in the upper frame to hold secure at a central non-activating point.
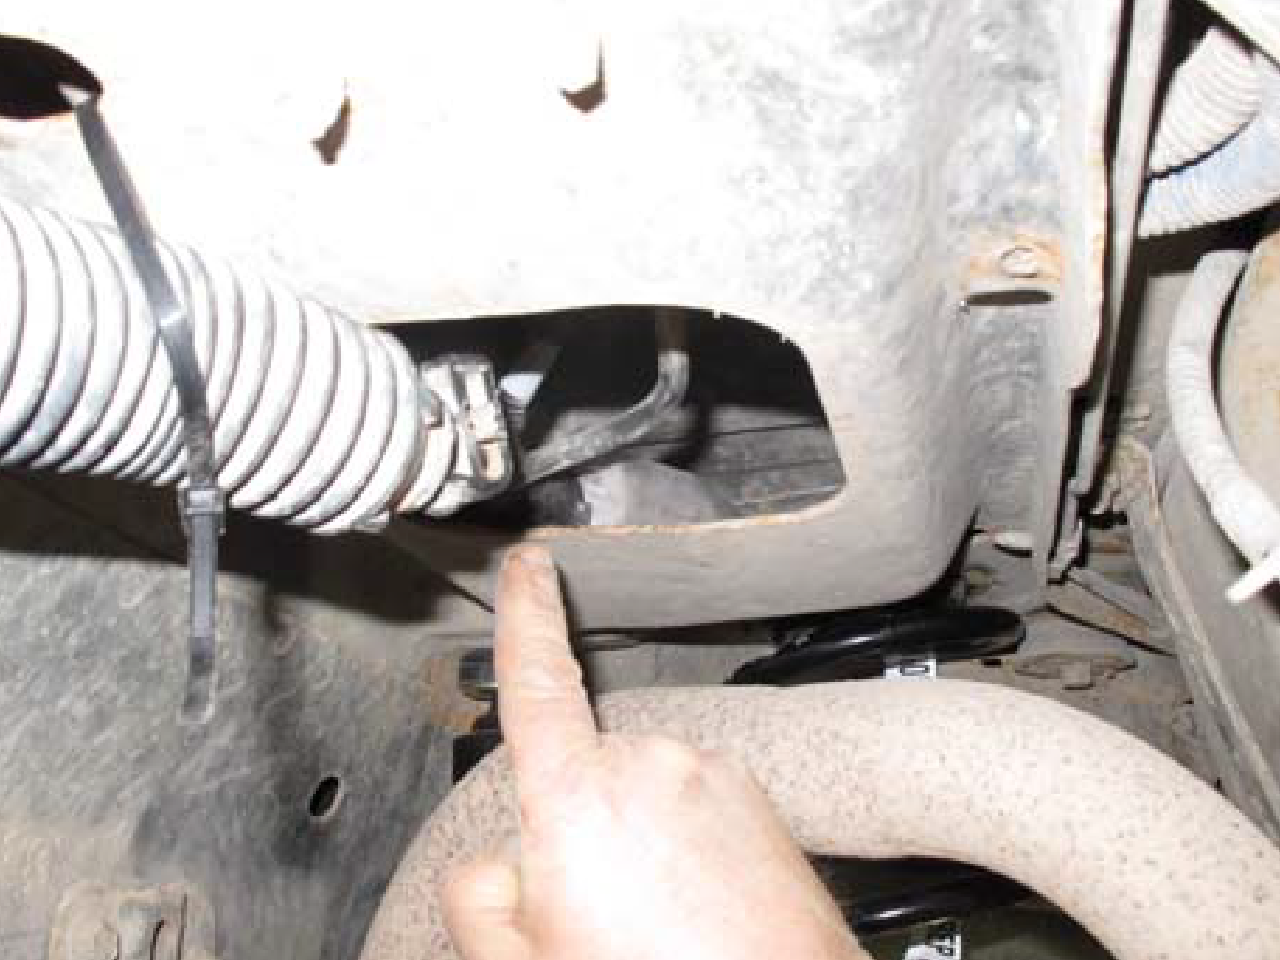
This part of the procedure relates to disabling the warning systems. There are different procedures for the Crown Victoria / Grand Marquis versus Town Car, review the model years. There are visual and/or audible warning signals, which may NOT be able to be eliminated on some models. However, these will not harm the operation of the vehicle or conversion.
- Make sure that the air system and ignition are OFF and disconnect battery ground.
- The air suspension switch in the trunk area should still be in the OFF position, if not previously done.
- Control Module location:
Lincoln Town Car:
- 1991-1994:
Located in the truck area on either the back of rear seat or behind a trim panel on right side. Locate the black and gray connectors (1 each color). - 1995-1997:
Located under the dash on the right side. Locate the black and gray connectors (1 each color). - 1998-1999:
Uses vehicle ECU, no module items available to disconnect. - 2000-2011:
Uses vehicle ECU, no module items available to disconnect.
Ford Crown Victoria/Mercury Grand Marquis:
- 1991-1994:
Located in the truck area on either the back of rear seat or behind a trim panel on right side. Locate the black and gray connectors (1 each color). - 1995-1997:
Located under the dash on the right side. Locate the black and gray connectors (1 each color). - 1998-1999:
Uses vehicle ECU, no module items available to disconnect. - 2000-2006:
Located under the dash on the right side. Locate the black and gray connectors (1 each color).
- 1991-1994:
- Disable Method and Warning Elimination:
Ford Crown Victoria and Mercury Grand Marquis:
- 1992-1997:
Dark Green/Light Green Strip. See procedure for 2000-2006 below. - 1998-1999:
Not possible, follow 2007-2011 Crown Victoria/Grand Marquis procedure. - 2000-2006:
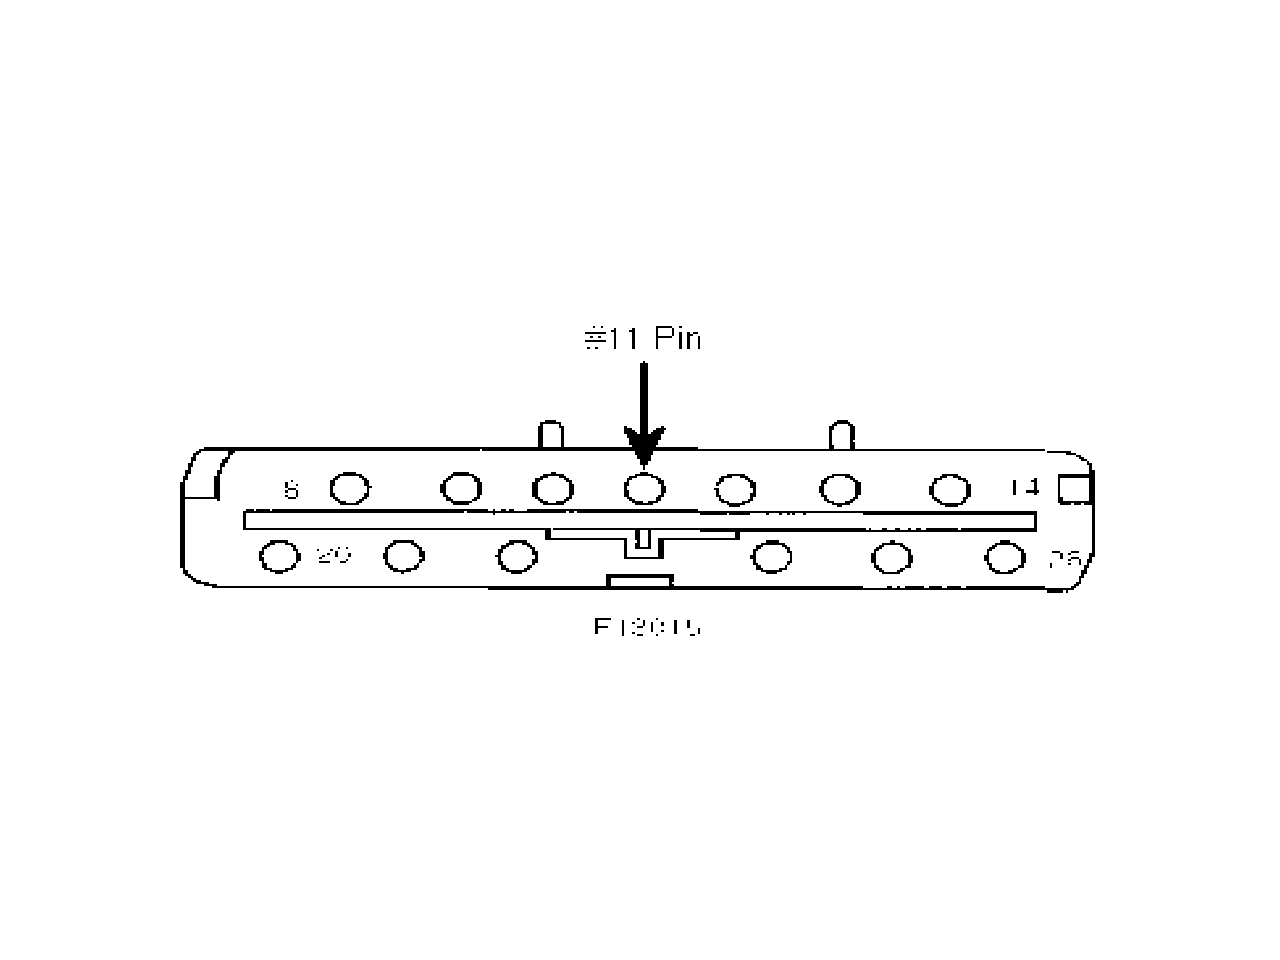
Dark Green/Light Green Strip. Disconnect the black connector from the module. The wire to pin no. 11 will need to be removed or cut for most model years to break continuity. This wire color code noted below for certain vehicles. Once this wire is removed from connector block or cut (if necessary), this will disable the “AIR SUSP” message indicator light. Reconnect the black connector back into the control module. - 2007-2011:
Not possible, no wire available to disconnect, must leave all items attached due to central data link connections (DLC). The air pump will need to REMAIN plugged in to complete the circuit with all other items attached. The air suspension module also controls the EVO steering module, thus system interconnection maintains message center information. With the system maintained to operate for other functions, the “SERVICE AIR SUSPENSION” message may still be activated. - 1992-1997 and 2000-2006:
The air pump will have to be disconnected, unplug the electrical connection to prevent pump from running (if still functional). Do NOT remove the fuse for the pump, as its affects other items within the electrical system.
Lincoln Town Car:
- 1991-1997:
Dark Green/Light Green Strip. See procedure for 2000-2006 Crown Victoria/Grand Marquis above. - 1998-2011:
Not possible, no wire available to disconnect, must leave all items attached due to central data link connections (DLC). The air pump will need to REMAIN plugged in to complete the circuit with all other items attached. The air suspension module also controls the EVO steering module, thus system interconnection maintains message center information. With the system maintained to operate for other functions, the “SERVICE AIR SUSPENSION” message may still be activated. - 1991-1997:
The air pump will have to be disconnected, unplug the electrical connection to prevent pump from running (if still functional). Do NOT remove the fuse for the pump, as its affects other items within the electrical system. For most vehicles with a message center, this can be eliminated by leaving the solenoid valves and ride height sensor attached. These are to be retained and packaged on the vehicle to complete the circuit for the system.
- 1992-1997:
- Reinstall battery ground and turn the air suspension switch ON when completed. The air system switch will affect other items within the electrical system.
The trigger for the air suspension to operate is the switch for interior lights when a door is opened or closed. This activates a relay on board, which senses the changed position of the ride height sensor. Thus, all doors must be shut completely. If this switch is inoperable, error message of “AIR SUSPENSION” can occur.
Lincoln Town Car:
- 1998-2011:
If the “AIR SUSPENSION” message is illuminated when ignition is turned ON, turn the ignition OFF. Open and close the driver’s door (all doors must be closed), then turn ignition back on. Message should be off.